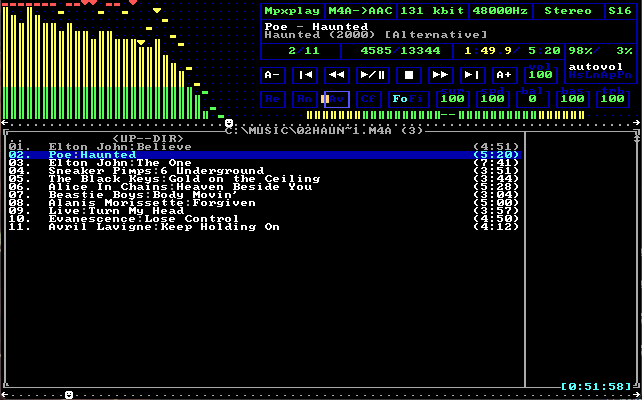
Found this out on the Interwebs. It’s a DOS music player from 1998, long before I had frequented the halls of Napster. Of course, the MPAA smacked us all down and 86’d all of the sharing for most of us. I’m pretty sure they would have litigated mix tapes, had they the ability to. Anyway, kind of cool to be able to run this in DOSBox and experience how people first experienced extracted music.
So, the BASH downloader worked well enough for what it was. Then I decided to do some functional upgrades. It got so complex for a BASH script that I decided to make it a C# app. The whole dotnet platform is kind of the new Java, so why not roll with it? Besides, I’m getting pretty good at this dotnet on Linux thing–all my servers that I run are Linux (mostly Debian). I used to be pretty big on PHP on that platform, but as dotnet has matured that’s gone by the wayside.
The end result was pretty good, I think. Fairly simple service-layer architecture, with one service for dealing with episode management, and one for managing the metadata. I have it set up as a scheduled task that runs every four hours on my Plex box. It’s done fairly well, after ironing out the kinks over a couple weeks.
The neat little part of it was Main was as simple as:
private static async Task Main(string[] args)
    {
        var serviceProvider = ServiceConfiguration
            .AddServices()
            .BuildServiceProvider();

        using (var scope = serviceProvider.CreateScope())
        {
            var episodeProcessing = scope.ServiceProvider.GetService<IEpisodeProcessing>();
            if (episodeProcessing != null)
            {
                await episodeProcessing.ProcessEpisodes();
            }
        }
    }
Much like the BASH script, it pulls from a list that I define–though, I threw that list into a SQLite db. Still thinking about how I want to manage the list. Possibly a web app, possibly an Electron app. A web app would be pretty simple, but I’ve poked at Electron a bit and I do dig how it’s pretty much a web app in spirit. We’ll see. It’s not like I add podcasts to my list very often, so I can ponder a bit.
A long time ago, in a galaxy far, far away…in the late 20th century…a young chap started out in Computer Science at the University of Colorado in Denver.
Things were going pretty well. Second semester hit, and the adventure really began. There was a course in object oriented development in C++ in this lad’s early CS career. He hadn’t seen objects before, and only had a notional understanding of what they were—if even that.
A project that took pretty much all of the semester was to create a set of classes to manipulate and display a linked list. This was his first foray into abstract data types. It was quite the effort across that semester, but it got done—and, not only was a program which handled CRUD for a linked list the end result, but an indexed one—to allow you to access values non-sequentially as if it were an array.
It was a cool project in the end, and this lad looks back with fondness at those early days, when all of it was so new.
Flash forward nearly three decades to the advent of LLM, Large Language Models.
It’s become a bit of a hobby of mine to throw things at ChatGPT, one of the more popular LLM generators these days, to see what it can do.
I gave it the basic requirements of that very same semester project freshman year. It generated a whole class, complete with a main driver, in mere seconds. You can’t help but feel a mix of fascination and a bit of melancholy as you watch all of that effort (which I could now do in less than an hour, myself) do it all in just a mere moment.
Also makes me wonder how creative professors have to get these days to come up with a project that can’t be easily generated 😂
ChatGPT helps you get answers, find inspiration and be more productive. It is free to use and easy to try. Just ask and ChatGPT can help with writing, learning, brainstorming and more.
I’m sure I’ll be modifying this more over time. But, it reads from a text file (podcasts.txt) in the given DOWNLOAD_PATH–this file contains the RSS URL(s) for the podcast(s). It organizes the podcasts into directories, if those directories don’t already exist. It uses eyeD3 to add metadata (including cover art). Works fairly well, though I’m still stomping bugs.
Maybe next I’ll put together a nice little frontend for it–maybe convert the whole thing to a Blazor app. But, for now, it does the thing and it’s fun being a script kiddie 🙂
#!/bin/bash

create_path() {
    TITLE_PATH="${DOWNLOAD_PATH}/${1}"

    if [ ! -d "${TITLE_PATH}" ]; then
       mkdir "${TITLE_PATH}"
    fi
}

sanitize_filename() {
  local filename="$1"
  # Replace unfriendly characters with underscore
  sanitized=$(echo "$filename" | sed 's/[\/:*?"<>|]/_/g')
  echo "$sanitized"
}

dl_podcast() {
    local RSS_FEED_URL=$1

    curl -s "$RSS_FEED_URL" > /tmp/rss_feed.xml

    title=$(get_podcast_title "${RSS_FEED_URL}")

    create_path "${title}"

    # Initialize arrays to store episode titles and enclosure URLs
    titles=()
    urls=()

    # Extract episode titles and enclosure URLs
    mapfile -t titles < <(xmllint --xpath '//item/title/text()' /tmp/rss_feed.xml)
    mapfile -t urls < <(xmllint --xpath '//item/enclosure/@url' /tmp/rss_feed.xml)

    # Print the episode titles and enclosure URLs
    j=${#titles[@]}
    padtowidth=${#j}
    for ((i=0; i<${#titles[@]}; i++)); do
	ep_title=$(echo "${titles[$i]}" | sed -e 's/<!\[CDATA\[//' -e 's/\]\]>//')
        url=`echo ${urls[$i]} | sed "s/url=//g"`
        url=`echo ${url} | sed "s/\"//g"`
        filenum=`printf "%0*d\n" $padtowidth $j`
        file="${filenum} $ep_title.mp3"
        file=$(sanitize_filename "${file}")

        if [ ! -f "${TITLE_PATH}/${file}" ]; then
            echo "Downloading: ${file} (${url})"
            wget -qO "${TITLE_PATH}/${file}" "${url}"
	    /usr/bin/eyeD3 --track "${filenum}" --disc-num "1" "${TITLE_PATH}/${file}"
	    /usr/bin/eyeD3 --add-image="/tmp/cover.jpg":FRONT_COVER "${TITLE_PATH}/${file}"
        fi
        j=`expr ${j} - 1`
    done

    unset ${TITLE_PATH}
}

get_podcast_title() {
    local url="${1}"
    local title="$(curl -s "$url" | grep -oP '<title>\K[^<]+' | sed -n '2p')"
    echo "${title}"
}

get_podcast_cover() {
    local url=$1
    local cover_url=$(curl -s "$url" | grep -oP '<itunes:image\s+href="\K[^"]+' | head -n 1)

    curl -s -o /tmp/cover.jpg ${cover_url}
}

cleanup() {
    rm /tmp/cover.jpg
    rm /tmp/rss_feed.xml
}

read_lines_into_array() {
    local file=$1

    # Check if file exists
    if [ ! -f "$file" ]; then
        echo "Error: File $file not found."
        exit 1
    fi

    # Read the file line by line and append each line to the array
    mapfile -t lines_array < "${file}"

    # Return the array
    echo "${lines_array[@]}"
}

process_podcasts() {
    local -n podcasts=$1

    for link in "${podcasts[@]}"; do
        get_podcast_cover "$link"

        title=$(get_podcast_title "$link")

        dl_podcast $link
    done
}

main()
{
    DOWNLOAD_PATH="<PODCAST DIRECTORY GOES HERE>"
    TITLE_PATH=${DOWNLOAD_PATH}

    if [ $# -ne 1 ]; then
        echo "Usage: $0 <rss url>"
        exit 1
    fi

    file=$1

    # Call the function and store the result in an array
    declare -A links
    links=$(read_lines_into_array "$file")

    # Print the contents of the resulting array
    process_podcasts links
    cleanup
}

main "$@"
Been working on a podcast downloader for use with Plex, since Plex decided to take away podcasts–basically I keep the ones I wanna retain long-term in a library collection now. The downloader is a simple BASH script. Seems to be nearly perfected, even adds metadata (track #, cover art, etc) to the downloaded mp3.
I think my last little issue is that I need to have it rename all the files whenever episodes hit a factor of 10 (e.g., if there are 10 episodes, episode one should be “01 – Title”, when it hits 100, episode one should be renamed to “001 – Title”). It’s a little thing–I just like my files sorting properly by name, no matter what OS I’m listing them in. And Linux sorts in lexicographical by default, as opposed to natural order
Some guys work in the garage on Saturday mornings–I work on code 🤣
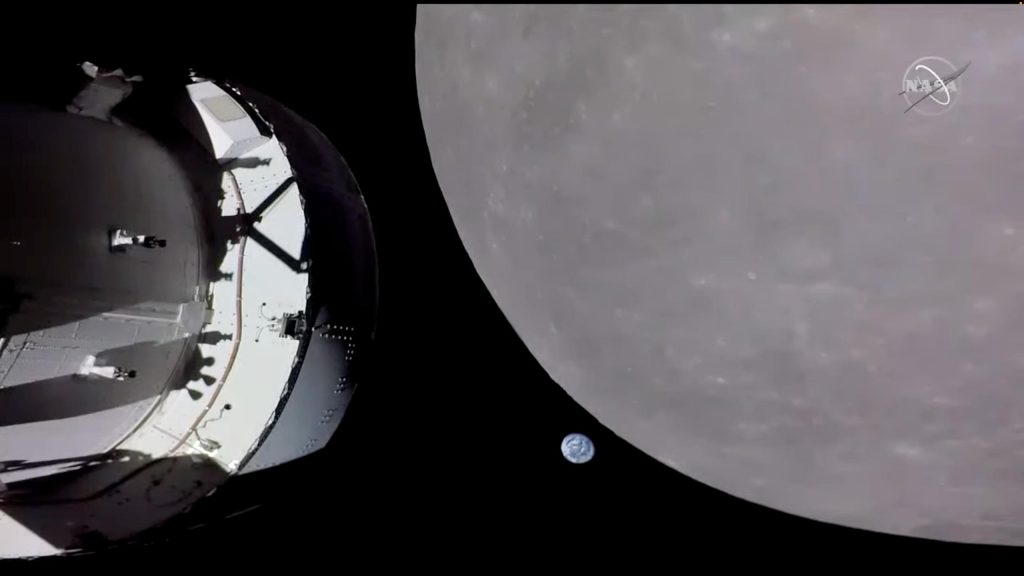
“Look again at that dot. That’s here. That’s home. That’s us. On it everyone you love, everyone you know, everyone you ever heard of, every human being who ever was, lived out their lives.” – Carl Sagan
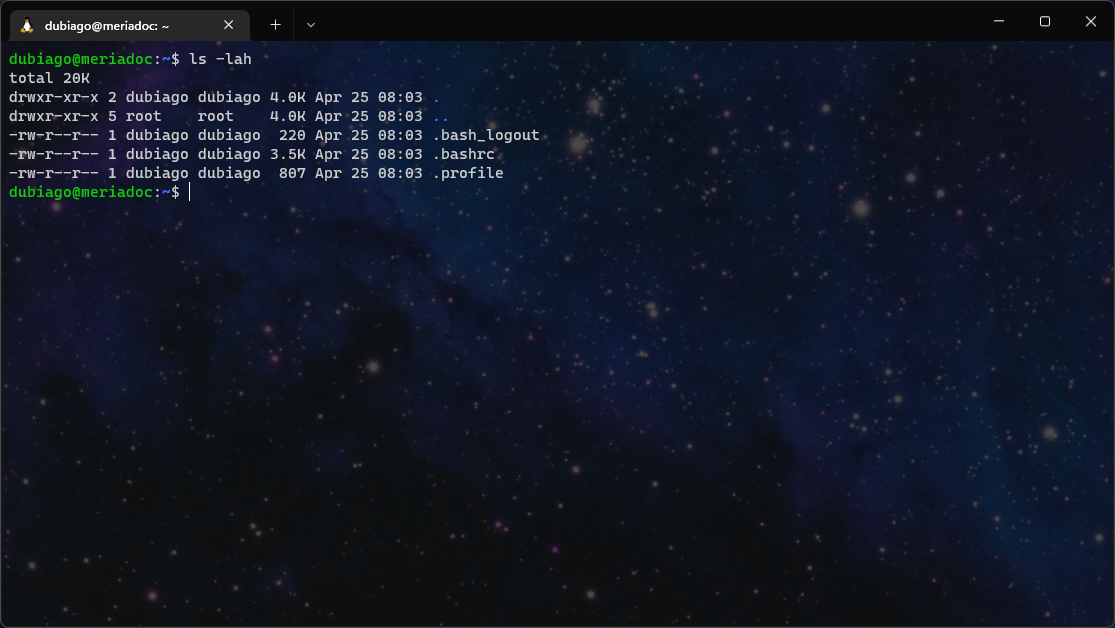
Windows Terminal handles opacity better than any other CLI ever did. I played with opacity some time back with Powershell before Windows Terminal came along, but the whole window became opaque, as opposed to just the content pane. I tend to set console opacity first-thing whenever I get a Mac, and it’s good that it can now be integrated into my Windows setup habits 😀 One can do this with the entirety of Windows Terminal, or narrow it to any specific command-line app you want.